A Mood Board is a collage of images that provide inspiration to the viewer. They help to spark ideas and thoughts.
Thursday, 25 November 2010
Tuesday, 26 October 2010
Monday, 25 October 2010
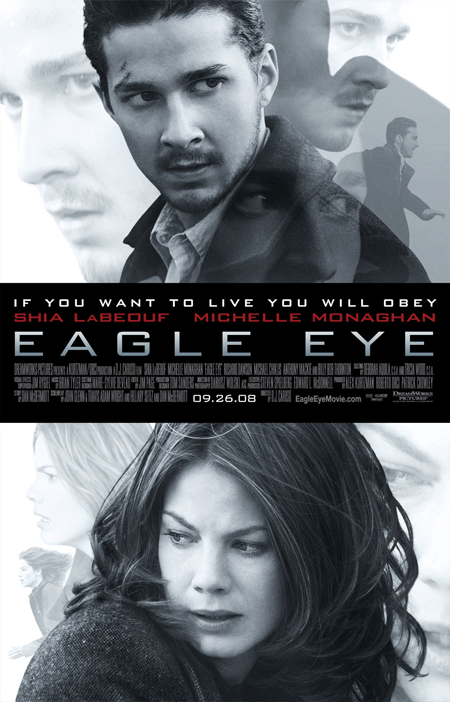
What is a Thriller/Horror?
Thriller/Horror is a genre that follow certain codes and conventions in order create a frightened/scared reaction from an audience. Suspence, tension, and excitement are the main elements in Thrillers. A genuine, standalone thriller is a film that provide thrills and keeps the audience cliff-hanging at the "edge of their seats" as the plot builds towards a climax. The tension usually arises when the characters are placed in a menacing situation, a mystery, or a trap from which escaping seems impossible. Life is threatened, usually because the principal character is unsuspectingly or unknowingly involved in a dangerous or potentially deadly situation. The victim of the danger is usually made to look vulnerable so the audience therefore sympathise.
There are many sub genres to Thrillers such as mystery thriller, crime thriller and psychological thriller.
The Thriller convetions used are:

There are many sub genres to Thrillers such as mystery thriller, crime thriller and psychological thriller.
The Thriller convetions used are:
- Twists to the end of a film
- Mystery elements (enigma codes)
- Tension/suspense
- Eerines/creepiness
- Darkness/ Flawed Heroes / Violence
- Complex Characters (in depth)
- Moral Ambiguity.
Wednesday, 20 October 2010
Preliminary Task post-production
First we had to acccess our footage in the Final Cut Server.
Then we tried to use Continuity editing.
Continuity Editing
Continuity editing is the most commonly used stlye of editing in the media world. This is editing that moves from each shot smoothly and makes sense to the audience. So if someone is moving then continuity editing would make that person move smoothly from two different shots. There is temporal continuity and spatial continuity each type involves different techniques that either promote or work against a sense of continuity.
Logging our shots
First we set up a log bin by clicking on File, New File and name is Log Bin. We then dragged our shots we wanted to use from the Rushes to the Log Bin. Then we watched all our shots and talked in our group about what shots to keep and reject. There were quite a lot of shots that we had to reject as our actors had mucked up their lines or something went wrong.
Oganising Shots
This caused our group great stress as we couldn't really decide what to use. We dicided to give priority to our actress Libby as she is the victim in the film and we want the audience to be on her side. To capture the anxiety and nervousness of the film we started by showing close ups of hands shaking, feet tapping and eyes darting. We used shots looking down on Libby to make appear as the victim and shots looking up at Ellie to make her appear menicing and scary. Then a wide shot to establish the scene.
Shot Order
We put into order the victims's story. So the majority of the shots were on the victim , while the minority were on the attacker. We set the shots in order to display the story to make sence, using shots that made libby look like the victim and Ellie as the "bad guy".
Editing in Final Cut
From the chosen scenes we thought that could have been of best use, we edited them to cut out the unwanted things, which might have been that an action we directed the actors to do was prolonged in order to choose the best bits and cut them our for later use. We also had to cut out the call for "Standby" and "action" which was a dilema at first but in the end, was finally dealt with.
Tuesday, 12 October 2010
Prelim Account of Shoot Day
We shot the scene in a spare classroom with our actresses Ellie and Libby wearing their own clothes. Blonde lighting was set up to help create the atmosphere, this meant that we had to check the white balance on our camera, we did this by putting a piece of paper in front of it and then adjusting the camera settings until the lighting looked normal.
The calssroom was a good location as it had lots of available props for us to use such as desks, chairs and books.
We started out with a Wide establishing shot to set the scene. The recorded the sound of them walking in and out the doors. We then raised the level of the tripod so that Ellie was looking down on Libby making her appear weak and vulnerable, we then did the opposite for Ellie by loweering the tripod so that the camera was looking up at Ellie. This made her appear ominous and threatening. we also did close ups of libby's eyes moving left and right appearing nervous and anxious. we then did over the shoulder shots aswell.
We also changed the location shooting Ellie walking in and out of the classroom from outside. All together we took lots of different various shots which will give us lots of different options when editing.
When filming, we had to continuously be aware of the 180 degree rule because if we broke it than it would mean that the person whom I am filming at that time, would suddenly appear in a different position than they were before and this could confuse the audience.
Overall i thought the preliminary task went really well and was a really good learning experience for us all.
Monday, 11 October 2010
Video Camera lessons
recently we had some video camera lessons where we learned about camera shots and how to operate the equipment.
Camera settings:
Date/Time imprint - This will appear on your screen as the time and date of your shooting, and it cannot be removed. First is the hours, then the minuets and then the seconds. And last bit of the time code is the frames. the maximum frames is 25 and then it will restart at zero.
White Balance - This is a button located on the side of the camera and helps the camera adjust to the light in the enviorment it is shot in. It's best to focus on a white surface when adjusting the light so the colour is clearer.
Zoom - There is a zoom control on the side of the camera that allows you to zoom in and out on objects.
If you want an object to be in focus far away, simply zoom in on it so it can focus and then zoom out.
Focus: there is a focus control on the camera that allows you to keep the object in your view finder sharp and clear. You can focus automatically or manually. Whilst in auto-focus the camera will automatically focus on what is in the view finder. But doing it manually allows you to focus on whatever you want according to your prefference.
Tripod - When using a camera you can use a tripod in order to keep the camera still, the shot smooth and the continuity much better. To set up the Tripod you must unhook the three legs so that they are at the right level. Then slide the camera into place on top of the tripod and secure it. To make sure it is level with the groud make sure the bubble is directly in the middle of the circle. This is called Bubbling. There is also a panning handle that allows you to pan across a scene smoothly.
Handheld - Or you can just hold the camera, for a dramatic effect. If you want the camera work to be jerky and move. This also allows you to shoot from more interesting angles rather than using a tripod.
Using the Camera:
There are many different camera shots that you can use for different effects such as...
Extreme wide shot - Often used as an establishing shot, where the subject is so far away it's hardly visable.
Very wide shot - A bit closer than EW shot but still far away
Wide shot - Even closer than VW shot where subject take up the whole frame
Mid shot - Where the only half of the subject is shown and even closer.
Medium close up - even closer Mid shot, usually head and shoulders of the subject
Close up - Just the face of subject shown
Extreme Close up - Only a feature on the subject is shown, such as the eye or mouth
Cut away shot - a shot of something other than the subject
Over the shoulder shot - where the camera is positioned over someones shoulder usually while two people are having a conversation.
Two shot - a comfortable shot of two people
Industry Termonology:
My personal experience:
I really enjoyed using the video camera, although i am more comfortaable using the still camera as i love being able to capture just a moment.
Althought the video camera has the ability to tell a story more than a still camera, which allows the camera man to be more creative.
I feel i can operate the video camera to an acceptable ability, but my talents really lie with the still camera.
Camera settings:
Date/Time imprint - This will appear on your screen as the time and date of your shooting, and it cannot be removed. First is the hours, then the minuets and then the seconds. And last bit of the time code is the frames. the maximum frames is 25 and then it will restart at zero.
White Balance - This is a button located on the side of the camera and helps the camera adjust to the light in the enviorment it is shot in. It's best to focus on a white surface when adjusting the light so the colour is clearer.
Zoom - There is a zoom control on the side of the camera that allows you to zoom in and out on objects.
If you want an object to be in focus far away, simply zoom in on it so it can focus and then zoom out.
Focus: there is a focus control on the camera that allows you to keep the object in your view finder sharp and clear. You can focus automatically or manually. Whilst in auto-focus the camera will automatically focus on what is in the view finder. But doing it manually allows you to focus on whatever you want according to your prefference.
Tripod - When using a camera you can use a tripod in order to keep the camera still, the shot smooth and the continuity much better. To set up the Tripod you must unhook the three legs so that they are at the right level. Then slide the camera into place on top of the tripod and secure it. To make sure it is level with the groud make sure the bubble is directly in the middle of the circle. This is called Bubbling. There is also a panning handle that allows you to pan across a scene smoothly.
Handheld - Or you can just hold the camera, for a dramatic effect. If you want the camera work to be jerky and move. This also allows you to shoot from more interesting angles rather than using a tripod.
Using the Camera:
There are many different camera shots that you can use for different effects such as...
Extreme wide shot - Often used as an establishing shot, where the subject is so far away it's hardly visable.
Very wide shot - A bit closer than EW shot but still far away
Wide shot - Even closer than VW shot where subject take up the whole frame
Mid shot - Where the only half of the subject is shown and even closer.
Medium close up - even closer Mid shot, usually head and shoulders of the subject
Close up - Just the face of subject shown
Extreme Close up - Only a feature on the subject is shown, such as the eye or mouth
Cut away shot - a shot of something other than the subject
Over the shoulder shot - where the camera is positioned over someones shoulder usually while two people are having a conversation.
Two shot - a comfortable shot of two people
Industry Termonology:
STAND BY / STANDING BY - readys everyone into position for the take. The AD calls STAND BY and the response tells them that everyone is prepped
TURN OVER / TURNING OVER (Roll film/Rolling etc) The director tells the camera operator to start filming - a few seconds of film is then run as the camera gets up to speed - this is often referred to as LEAD IN. Once done the Camera operator will respond TURNING OVER or ROLLING (etc) to indicate being up to speed
ACTION! - Cue for the actors to perform the take, and the crew to do their jobs. It is good practice for the Director to let the film run on a further few seconds after the take is completed before cutting - this is referred to as LEAD OUT
CUT! - Cue for the camera to stop running film. Industry practice expects that the camera operator does not CUT before being told
My personal experience:
I really enjoyed using the video camera, although i am more comfortaable using the still camera as i love being able to capture just a moment.
Althought the video camera has the ability to tell a story more than a still camera, which allows the camera man to be more creative.
I feel i can operate the video camera to an acceptable ability, but my talents really lie with the still camera.
Wednesday, 22 September 2010
Basic skills camera work and composition
Composition:
Photography brings a visual language that is universal in understanding. We must then understand its vocabulary which consists of shapes, textures, patterns, lines, colours, shade of light to dark and sharp to blurry images. Just as we must learn to arrange words in a coherent order in order to make sense when we write or speak, so too must we put visual elements together in an organized manner if our photographs are to convey their meaning clearly and vividly.
Composition means arrangement: the orderly putting together of parts to make a unified whole; composition through a personal, intuitive act. However, there are basic principles that govern the way visual elements behave and interact when you combine them inside the four borders of a photograph. Once we have sharpened our vision and grasped these basic ideas of principles, then we will have the potential for making our photographs more exciting and effective than ever before.
The Rule of thirds:
Using the steps outlined previously to help tightened
The Rule of thirds:
Using the steps outlined previously to help tightened
Monday, 20 September 2010
How to use Photoshop
Abode Photoshop is a graphic and picture editing tool. It enables the user to alter, manipulate and create images either from existing photos or found images.
Photoshop CS2 is the package we use here.
Example tool used;
Marquee Tool - cuts box shapes around a part of the image, then you can copy and paste that image into another picture
Lasso Tool- helps you to accurately cut an image out and copy and paste it into another picture.
Spot healing Tool- allows you to hide imperfactions that may be visable. Simply click on the spot you want removed.
Clone Stamp Tool- allows you to copy parts of an image into another image. Simply press Alt and click to select the area you want cloned. Burning and Dodging - You can use the burn tool to burn the images to make them look older, darker or damaged.
Lighten and Darken - To lighten and darken areas that are well exposed but just don't look right yet, first try dragging the middle gray triangle back and forth. Just do it till it looks right
We took an image from the movie CloverField and had to insert an image of a person walking acroos the water. This required us to cut out the image using Lasso then copy and paste. Then we had to make the colours match up by going to Image - Adjustments - Hue/saturation. Then selcting a hue that was similar to the image. The we had to add a reflection of the person in the water. So we copied and pasted the person again and then rotated them and flipped them over. Then we had to add ripples to the water by going to Filter- Distort- Ripple. This helped to make the image more realistic.

My personal experience:
I found photoshop very difficult! It was extremely confusing and too technical for me! I especially found the clone stamp really hard to operate as it never did exactly what i wanted. But i can now see how many amazing things photoshop does and the huge impact it has had on the media industry.
Monday, 7 June 2010
Introduction to Media Studies
This year we will study all areas of film making, including camera work,
editing and photoshop. We will also learn the basic codes and conventions of Thriller movies, and how to create supense and atmosphere on film. Then eventually we will film our own Thriller movie Introduction using all the skills we will learn, in a group. Then we will start the editing process, until we reach the final product.
editing and photoshop. We will also learn the basic codes and conventions of Thriller movies, and how to create supense and atmosphere on film. Then eventually we will film our own Thriller movie Introduction using all the skills we will learn, in a group. Then we will start the editing process, until we reach the final product.
Saturday, 10 April 2010
Prelim Account of shoot day
We decided to shoot our film in a classroom. As the room featured a door that was very effective and the actress could be shot in different levels and angles. We used the close-up of the actresses hand on the door handle which could be used later on to create suspense. Daniella was the "director". And she would shout 'stand-by' for every one's attention on cast. And signalled the actresses in by shouting "Action!"
I participated in the camera work and shot many of sences, exploring different angles and levels to shoot. When to use zoom and when to follow the actresses or not.
Lighting
We use 2 blond lights that created a more kind of theatrical effective imagery on the actresses figures to highlight and sharpen their facial expressions.
This effect was important to the scene as it created an edgy suspenseful scene. The artificial blond light gave that kind of strong eery atmoshpere to the actresses and props.
Filming
We did set the camera up correctly. We used the tripod, unlocked and locked the nuts as necessary. We also hand-held the camera, for the majority of the time to give a more realistic and nervous effect to the audience's view.
We did remember to use the white balance, we adjusted it when were inside the darkened room and outside in the natural light. We did have to remind the camera-man not to film a shot in front of the blonds lights as it would create an unexplained shadow and create an error in a shot.
We used appropriate angles to the shot. Upward view shot and downward view shot on the actress - this gave feeling on superiority or inferiority on a character. We used an over-shoulder shot to emphasise we are on that characters side and viewing their point of view as if the audience were that person.
We took make close-ups on parts of the body, such as hands and feet twitching nervously to create an anxious atmosphere. We abided by the 180 degree rule.
I have learnt the basics of the camera functioning. And tried to apply them to the use of shooting scenes. We have adapted the way a camera should be used when shooting a preferred scene. So our script gave a sense of suspense, and therefore we zoomed in on Extreme close-ups of the eyes, hands and feet and close-ups on the face. Long-shots were used so the audience could establish the location and medium-shot was used to emphasise an importance on a characters speech.
Subscribe to:
Posts (Atom)